Tuesday, December 1, 2015

The EVERLASTING.... Bulletin Board!!!

Now this, is a post for all my fellow teachers out there; art teachers, general education teachers, music teachers, all of you!!!

One of the things which seem to make a school a much more vibrant, exciting, happy, and aesthetically pleasing place... is the hallways... and what helps turn a hallway from "blah" to "hoorah!"?   
THE BULLETIN BOARDS!!!   

Now, typically the bulletin board can be a nightmare to manage- constantly changing the paper due to fading, ripping, and such can be a lot of work that is hard to find time for in a teachers day.  I had the opportunity to try out some Pacon bulletin board paper, and while it may be a tad more expensive than the typical industrial roles- it is fadeless, vibrant, and catches the eye of students, parents, teachers, and leaders within the building.  Finally, I finished off my board with some metallic bordette for detail from Pacon as well.  And my board was ready for work to be displayed!!
Then there's the question of what to display? 
                        Tests? Let's be honest, They're not really fun to look at....  
                                          Worksheets? Who wants to see 25 of the same worksheet?.......
                                                           Data? Okay, we ALL see enough of that in our daily lives......

The SOLUTION?! 
                                                              
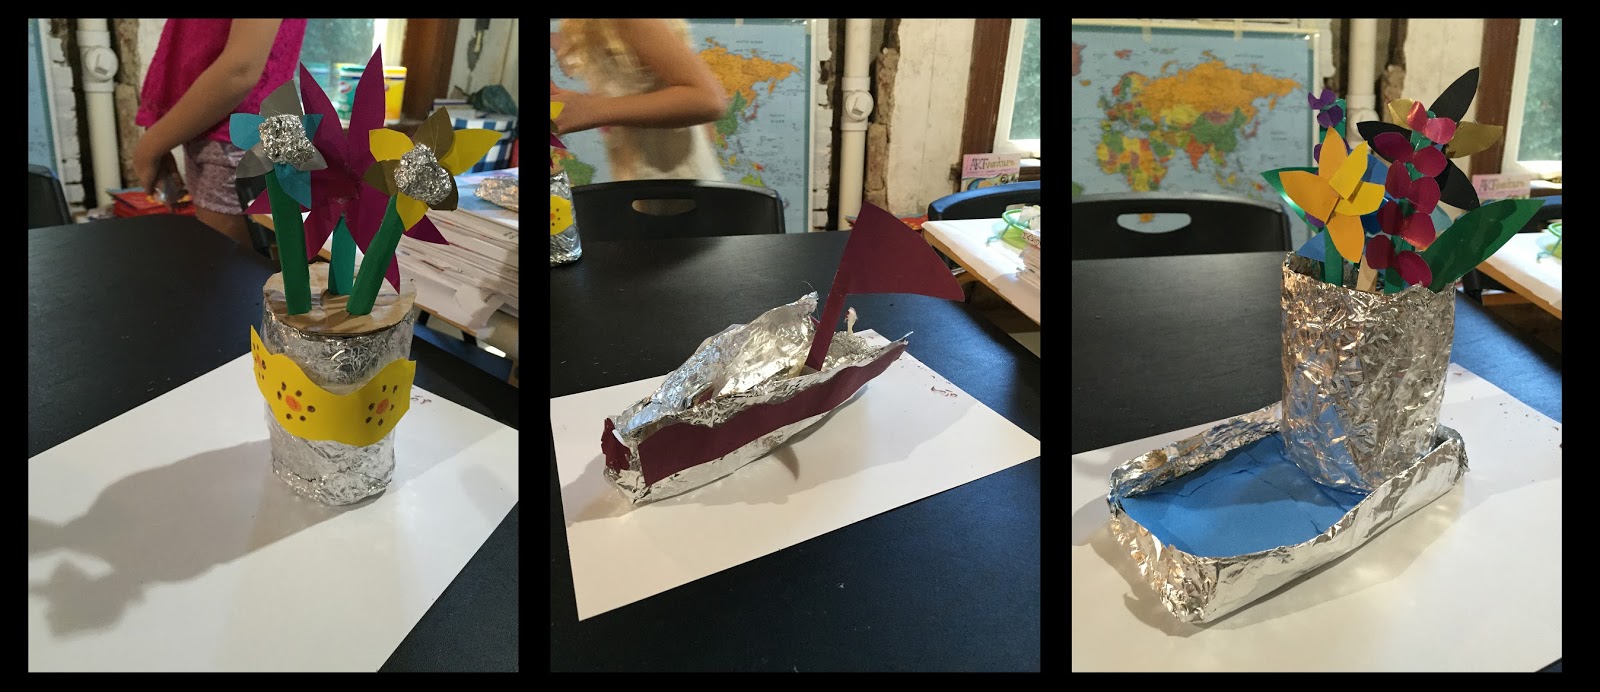
How about... student artwork,  class projects,  photos of field trips, information for parents/families!?
The key I've found to a great bulletin board is one which isn't too text heavy, uses a lot of bright colors, shapes, and different fonts!  Also- changing your bulletin board monthly always keeps parents, students, administration, and colleagues informed of the amazing things happening in your room, or reinforces school wide themes/concepts being emphasized.


  For my summer art board(pictured above) I also used the Pacon Bulletin Board Self Adhesive Letters.

 This bulletin board has had the same paper and border on it for months!  It still shines brightly, remains in one piece, and you can't even notice where push pins and staples have been in it!  We are getting ready for ANOTHER bulletin board change and I know this paper will hold up through the rest of this year!  Stay tuned for bulletin board updates throughout the year!  My goal: change the bulletin board MONTHLY! 

Monday, November 9, 2015

Symbolic Self-Portraits Inspired by Maria Fabrizio!

Recently I had the amazing opportunity to plan a lesson based off of artist Maria Fabrizio.  Maria is an incredible artist who is a graphic designer by day, and by morning, the creator of Wordless News which is  a blog, which illustrates "One headline per day, vowel and consonant free" The following is a description of her blog and it's concept:

"Wordless News is a weekday creative ritual starting at 4:45am. Maria gets up, reads the news, sketches, digitizes, and posts an editorial illustration for a selected headline. " *

Learning Targets, Maria's headline/work, and teacher exemplars.
 I took Maria's process of turning words into a visual which everyone can understand and developed a lesson of symbolic self portraits.  I've been stressing to students the importance of their visual reading level, and that everyone has a high visual reading level, because EVERYONE can READ a PICTURE!!

Students began by completing an "I am..." poem format to truly begin to identify and discover what makes them each so unique and different from one another.  This ranged from cultural beliefs and heritage, to adjectives, hopes and dreams for themselves.

Student "I Am..." Poem and Symbol Brainstorm Page
Once students completed their poem/writing, we began to dive into the idea of symbols.  Starting with simple symbols they knew such as soccer team logos, Starbucks, and Target symbols, students began to develop symbols for their writing.  After they brainstormed, we spent a day discussing material choice and composition.  Students could choose from: crayons, markers, colored pencils, oil pastels, and collage for this project.  Students were shown multiple approaches to ways one might organize their final composition but it was left up to the student. 
Student Work in Progress, Organized Compositions


A great activity I did as a warm-up with students was printing out four pieces by Maria and asking students to write the headline which could have inspired her work of art from that day.  This challenged students because rather than working from words to pictures, they were forced to work from pictures to words to experience both approaches.


Students did a wonderful job on this project and took pride within their work.  Fifth grade is an awkward time where students are figuring out social groups, interests, strengths, and cultures/traditions which they identify themselves with.  This project seemed to help students become more confident of expressing themselves and stating their thoughts and ideas with their classmates.  It sparked many interesting conversations about different beliefs and traditions! 
Final Products (hoping to get better quality photos soon!)

During the lesson, one class was filmed as I planned this lesson to participate in the National Art Education Association's fall virtual conference in September.  At the conference I had the opportunity to meet Maria and do a brief interview/panel with fellow art teachers about her work!  It was a blast and I am so fortunate to have been offered the opportunity to participate.  To the left is an image of a instagram post while my classroom footage was rolling!!  Students really enjoyed seeing the footage as well after the conference streamed live!!

Below are some additional final products created by fifth graders, inspired by Maria Fabrizio's process!!

Thanks for sticking with me through this long post!!!
*All text and information on artist Maria Fabrizio was found from her website: www.wordlessnews.com 

Monday, October 19, 2015

Donors Choose Project Posted! Help the Bancroft Art Room!

Hello Everyone!   We're in the midst of wrapping up our first projects of the year so get ready for some incredibly creative takes on self-portraits in the next week!

As the start of the school year has come and I made it through the first 6 weeks, I've realized just how much I rely upon my library of art related books for students not only in the youngest grades, but for even the fifth graders.  The art room library is a place students go to find creative solutions and ideas for their projects, and my oldest students have let me know, they want NEW BOOKS!  So, I've created a Donors Choose project to get some amazing new inspiring, and motivating books to add to the classroom library!  If you or someone you know might be able to help raise funds for these books please share the link below!!  Check out my full project on-line by clicking HERE!


Monday, September 21, 2015

Organization... in an ART ROOM with CHOICE?! MISSION POSSIBLE!


 We all know art teachers have tons of stuff in their rooms, and I mean TONS of STUFF!  Above is a show of my room(yes during week 0 so no students had touched it yet) and how I like to keep things organized.  It's hard to see but materials are lined on the counter tops, one bin of each supply for every table.... yup, it's a lot of bins!  The challenge for me came at the end of last year when I implemented a full choice based instructional model with my 4th grade... I opened up the opportunity of clay and construction/building, and quickly found that my organization was not quite there. 

The challenge with the construction/building center, was that there were just so many different components students needed: tape(scotch, masking, and packing), cardboard, popsicle sticks, scissors, and cold flow glue guns.  That's WAY too many bins for one table.... and then I discovered this Activity Tray from Pacon.  This awesome organizer holds everthing students would need in one easy to carry tray.  Students took alot of ownership in carrying it to and from it's counter spot and really keeping it neat and organized.  Not only that, but I've used it other times when I've traveled to a classroom for various reasons.  The coolest part to me, is that each of the small sections comes out so you can move it around the way you want it!  I must admit when I first got it I wondered how durable it would be, but it doesn't have a scratch, dent, tear, or mis-shaped part yet(and it's been at the mercy of 60 4th graders!)  This is definitely something I'd like to invest in for each of my tables as I continue choice based instruction this year. 


To the right are two buildings students envisioned, planned, and constructed with the help of the organizational tray.  These were fully built/constructed in 2 classes! I'd say it was a successful first try at a full choice based implementation for my students!!


 * A huge Bancroft ROAR to Pacon for graciously donating the activity tray which made this project a well organized and well managed success!*

Sunday, September 13, 2015

We're BACK!

Hopefully everyone had a great summer!  As I began my 6th year teaching at Bancroft, I found myself more and more excited to see my students.  I've spent 5 years building relationships, earning students trust, learning about each students strengths and challenges, and the start to the year this year would be best described as calm and collected.  My students have amazed me already with their focus, ability levels, creativity, and willingness to take a risk. 

One thing I've notices is that being in a bilingual school, vocabulary is CRUCIAL for students, and it's twice as challenging because they're learning in two languages.  Even harder for me, is that I teach in English, and I realized there are students that I know would know the answer to my questions or the proper vocabulary in Spanish.  So I thought, how do I teach my English dominant students the Spanish vocab. and vice versa.  Well, of course I was told "You should make a word wall" but I just couldnt figure out how to make it an organized, and legible(from all seats) success.  Plus, my walls didn't have much space I could reach!!  So I thought about it.   The result?  My vocabulary Folder!! There is one folder per table for students to use as reference when they are working.  They are particularly popular during reflection sheets, as students use them for spelling!  I hope this sparks some ideas, or thoughts about vocabulary walls, charts, folders, etc. 

The front of the folder goes through the various types of images we typically create. 
The middle of the folder walks students through the elements of art and the crucial vocabulary they should know by the time they leave Bancroft in the 5th grade.  Now, there are always more vocabulary words we cover, but these are just the basics. 
The back of the folder lists common supplies/materials we use at Bancroft.  It also has the artistic process I use with students and appropriate questions for class discussion during all stages. 

Tuesday, August 18, 2015

Portrait Day at ARTventure DC!


During Session 3 of ARTventure DC we explored portraiture in a new way!  Campers filled in the background of their final pieces with symbols, colors, shapes, or anything that helped express who they are and what they love!  While campers did this, I used the clear glass door, transparencies, and a sharpie to trace their face!  We then cut out a frame out of some metallic paper, attached it all together, and the images above and below are what we got!  I am thinking about trying this with my students this year by having them place a transparency on a mirror and trace that way!


Friday, August 14, 2015

Full Choice Based: A First Attempt and SUCCESS!!

Envision...Plan...Create...Reflect
Recently I noticed a huge spike in views of my previous post about implementing choice based visual arts classes, and it reminded me... I never posted my first attempt at implementing a full choice based model within my classroom this past year!!

The image to the left is a written out version of an artistic process to students.  They use this document to guide themselves through their artistic thinking, and to prompt conversation which leads to a deeper understanding of what they're doing, and reflection upon their process. Being at a bilingual school, of course this is in English and Spanish so all students can utilize it.  Also, students use a small foam square/piece of paper throughout the class to place it on the step they're on so I know where they are in their process and can prompt with proper  questioning.


The document to the right is how we begin brainstorming what a student wants to create.  They first complete the "Art Search" where they find a piece of artwork they find unique or inspiring. This piece typically guides them and helps them Envision for the next page "Creation Brainstorming" where they begin to Plan their own project. 


What comes next?  CREATION of course!  Once students have finished their creation brainstorming page, we hold a mini-conference where we go over exactly what they have envisioned and the way they plan to execute their design.  This conversation is crucial and many times students end up revising their plan 1-2 times before moving on to the create stage.  For classroom set up, I typically have students sit within the same artistic media, or project type so they can assist one another when they encounter a challenge.  This also creates a great classroom environment as it pushes students to build friendships with classmates they might not usually choose to socialize with in another environment!
Above you can see an image of one student working on a landscape, and another is working on the interior design of a building.  The image on the right shows students in the reflection stage.  The artist of the piece chose to create a collage of various soccer items, and wanted help arranging each individual piece he made.  Rather than immediately coming to the me for help, he sought out the advice and thoughts of his classmates.  This involved 3-5 classmates, which sparked a larger conversation about composition, balance, and symmetry.... all without the assistance of the teacher!!!
(I can't lie it was one of those proud moments that made you want to cry, but also left me feeling a little useless since they could do it all themselves!!!)

Above are some final product examples from students in my first attempt at a full choice based instructional model.  Not only did it push my students to envision and create these amazing final products, but it truly increased their motivation, investment, and sense of pride in themselves and their work.  I've never had students ask, beg,  and plead for me to come pick them up during morning recess, lunch, and their average recess so they can continue working on their project.  Students also gained a sense of ownership and responsibility for their classroom.  Students did a remarkable job keeping supplies orderly and taken care of!

Notice the folder on the table in the third image?  It's the equivalent of an art vocabulary word wall in one compact file folder!  I'll be doing a blog post on it soon!  It's a great bilingual teaching resource!!


Wednesday, August 12, 2015

Andy Warhol Prints & Plen Aire Painting!

 Andy Warhol Printmaking:
Campers were introduced to Andy Warhol this week and looked at some of his iconic images.  Most campers agreed, he had some funny hair, and looked a little "weird" as they put it.  Campers enjoyed the repetition within his pieces and the colors he chose.  We used styrofoam plates to gently carve our images into, then printed each plate four times to get the repeating effect of Warhol's work!  Check out the results below!


Impressionist Landscapes:
Campers looked closely at the work of the impressionists one day this week as well.  They faced the challenge of painting outdoors as the impressionists did.  Initially, there was excitement, and many said "this will be so easy!!".  Campers quickly learned how overwhelming it can be to choose your composition, and how some things in nature move.   It was such an amazing experience, but sadly I forgot to take pictures of their final images!  So below are some action shots!!

 National Gallery of Art:
Our final day of camp we visited the National Gallery of Art to see work by the impressionists we learned about.  Campers really enjoyed also finding the Degas dancer within the museum as well.  You can see they tried to pose like the dancer! We again, got the compliment that we were one of the most responsible groups of artists the guards and docents had seen throughout the museum!!


Andy Warhol Prints

 Impressionist Landscapes


Wednesday, July 22, 2015

ARTventure DC Session 2, Part 1!


ARTventure DC Session 2: Meet the Artists 

This week we have another excited and creative group of campers, and it's girls week.  Somehow there are only girls this week so clearly we have been listening to TONS of Taylor Swift while making art!  

Here is an overview of the projects this post:
  • Monday: Henri Matisse: Campers learned about the life of Henri Matisse and focused on his collage technique.  Campers created their own collage today! 
  • Tuesday: Alberto Giacometti: Campers looked at hor Giacometti transitioned from painter to sculptor, and were inspired and challenged to create any sort of sculpture today from easily found materials!  


 Students have a page we glue into our sketchbooks every morning, they then cut and paste corresponding facts and images about the artist into their sketchbook. This is an easy way for them to remember all the artists and facts they learn! To the right you can see a camper preparing for the day with her sketchbook!  Her Henri Matisse collage is pictured on the right, it's a cake with candles and a present!


Left: Margo  Right: Ames 

Left:house, sunset, and flag of Colombia by YuliMiddle: Palm tree and the beach by Adler, Right: House, Moon and stars by Ava
Even Ms. Foy and Ms. Monica got to make collages today!!! 
Left: Sun, Water and Boat by Ms. Monica    Right: Mountains and night sky by Ms. Foy

Tuesday we learned about sculpture!  Campers were very excited to begin this project, but then encountered many challenges which they had to work through.  We quickly realized that imagining what you want to create can be alot easier than actually creating it.   

Materials: Tape(Packing and Masking), Tin Foil, Hot Glue, Paper, Scissors, Popsicle Sticks, Q-tips, Cardboard
Check out our creations!
Left: House by Ames   Middle: Flower and Vase by Margo   Right: Flowers, Vase and Tray by Ava
Left: Flowers and Vase by Adler    Middle: Sailboat by Adler    Right Flowers, Vase and Tray by Ava


Check back soon to see our awesome Andy Warhol inspired printmaking pieces, impressionist paintings, and more!


Sunday, July 19, 2015

ARTventure DC: Session 1 Museum Trip!

As a final camp experience, we ventured out to The National Gallery of Art in downtown DC! We ventured onto the metro and impressed other riders with how orderly and quickly we all got through the turnstyles swiping our metro cards during the AM commute!  We walked from the Archives-Navy Memorial metro stop and arrived just before the museum opened in time for a story about visiting the museum...

Once the museum finally opened, we traveled inside through the marble hallways and stairs.  We were approached by a museum staff member who made a point to come over to tell us that we were one of the most responsible, and respectful group of campers he had seen in the museum!  Campers spent time looking through some landscapes(one which had the Parthenon painted in it which we looked at Thursday!).  Eventually we wandered to the room which I find kids are always fascinated by; the room which holds the Shaw Memorial.  We picked up  a handy little kids guide which talkes about this piece, and found the corresponding pages...
The favorite prompt/question for this piece was about imagining and sharing what sounds you would hear in this piece of art.  Campers got very creative with this and built off each others ideas! After about an hour and a half exploring the museum, we headed back to camp!
Thanks to the AMAZING Ms. Monica for documenting our day at the museum with her camera!  I find on field trip and travel days I always forget to take pictures... and here's a rare thing you wont usually see on this blog... a picture with me in it!!! 

THANK YOU to the amazing parents and campers of ARTventure DC session 1!  I had such an amazing time with you all!  Teaching, creating, and learning with these kids is an amazing opportunity and I'm so glad I get to see some of my students year round and help their love, knowledge, and skills within art continue to grow!

Tuesday, July 14, 2015

ARTventure DC 2015: Art Around the World, Part 2!!

As promised, here comes some more ARTventure DC fun from session 1: Art Around the World!

For this project we set up outside of the normal ARTventure DC Studio, because things were about to get REALLY messy (because where's the fun with no mess?!).  Students used cooked spaghetti noodles to splatter paint in the style of artist Jackson Pollock. Campers quickly realized how tiring this method was, and were blown away at the concept that some of Pollocks pieces were larger than they were!! Here's some great final pieces!

The following day at camp we jumped into Architecture and the way buildings look.  Campers looked at iconic architecture from Greece, Italy, France, India, and related it back to pieces of architecture here in the U.S.A.  Campers were then sent to create their own piece of architecture using: Cardboard, Q-Tips, Popsicle Sticks, Hot Glue, Tape, and Oil Pastels. 


One final activity we did, well actually I hadn't planned on doing this, but the campers gave me the idea... we had an ART SALE!!!! 

How did this work? Well here goes:
1. Each camper started the day with $10 (play money). 
2. Campers could award to others, or receive extra $ for being role model artists.  
(for example, Margo found 2-3 pieces of Ian's legos he was missing, so Ian shared that he thought she deserved $3 extra for being such a great friend, all the campers agreed, and Margo of course accepted)
3. Campers created 6 drawings which they felt would sell and priced them according to the value they thought they were worth. 
4. Campers gathered in a circle, laid out their creations, and moved any pieces the did not wish to sell, behind them.
5.  We looked for 3 solid minutes at what we hoped to buy... there was total silence...
6.  We went around the circle signifying with a raised hand that there was a piece someone wanted to buy.
 
Now, as time went on campers realized in order to buy they also have to sell, so we allowed negotiations to be made which was an interesting process some art dropped from $10 to $2 while other pieces went from $6 to "I'll just take all your money". At the end of the day, it was possibly one of the most intense and focused moments of art camp, but one that the campers begged to do for the rest of camp!!!

Monday, July 13, 2015

ARTventure DC 2015: Art Around the World, Part 1!

ARTventure DC 2015 has BEGUN!  
Some of you may recall seeing posts last summer about the mini summer camp I run, called ARTventure DC. Well, we have changed the format a little bit this year, to less travel, more arts experiences, and session one was AMAZING!  Above, you can see the camp location is the beautiful basement of a Bancroft family's house, which is the perfect location for imagining, creating, and of course, making a mess! 
 Filled with campers the space looks great!  Camp runs from 8:00-12:00 Monday through Friday for three weeks throughout the summer and on Friday we travel to an art museum to see the work and artists we have learned about throughout the week. This week the theme was "Art Around the World".  We focused on a particular artist or style from countries like the U.S.A., Australia, Japan, Italy, India, Greece, and more!  
Here are our 2 of our projects!  Check back soon for more! 


Japanese Wood Block Prints
One day, we travelled to Japan to look at the way they created art through printmaking.  We talked about the various methods of printmaking and materials, and realized that woodblock carving was a very challenging process.  So instead, we used styrofoam plates and a dull pencil to create our own image.  While campers worked on carving their image, Ms. Monica and I made some prints with color of plain plates(seen above, middle photo).  Campers then used the brayers to ink and print their own images.  Check out our results! 
   Campers had a small 2inch by 2inch square to first practice their carving skills on, and we decided to print each others small squares to make a collaborative piece of art.  Check out one of our collaborative pieces below!(even Ms. Monica and Ms. Foy made squares to print!)

The next day at camp, we learned about various Abstract and Pop Artists from the United States!  We got alot of inspiration to create jumbled up works of art like Jasper Johns, and  shape focused art like WassilyKandinsky(okay okay, we know he wasn't born in the U.S.A., but we still loved his work!).  Just a few of our creations are below! 


 Another artist we learned about was Jackson Pollock, have you seen his work?  He used his the force of his whole body to paint flinging his paint across the canvas....well to get a little inspiration and an appreciation for his hard work we painted by flinging...... SPAGHETTI across our pages..... 

Check back later this week to see our SPAGHETTI ART!!!!