Hello Everyone! We're in the midst of wrapping up our first projects of the year so get ready for some incredibly creative takes on self-portraits in the next week!
As the start of the school year has come and I made it through the first 6 weeks, I've realized just how much I rely upon my library of art related books for students not only in the youngest grades, but for even the fifth graders. The art room library is a place students go to find creative solutions and ideas for their projects, and my oldest students have let me know, they want NEW BOOKS! So, I've created a Donors Choose project to get some amazing new inspiring, and motivating books to add to the classroom library! If you or someone you know might be able to help raise funds for these books please share the link below!! Check out my full project on-line by clicking HERE!
Monday, October 19, 2015
Monday, September 21, 2015
Organization... in an ART ROOM with CHOICE?! MISSION POSSIBLE!


To the right are two buildings students envisioned, planned, and constructed with the help of the organizational tray. These were fully built/constructed in 2 classes! I'd say it was a successful first try at a full choice based implementation for my students!!
* A huge Bancroft ROAR to Pacon for graciously donating the activity tray which made this project a well organized and well managed success!*
Sunday, September 13, 2015
We're BACK!
Hopefully everyone had a great summer! As I began my 6th year teaching at Bancroft, I found myself more and more excited to see my students. I've spent 5 years building relationships, earning students trust, learning about each students strengths and challenges, and the start to the year this year would be best described as calm and collected. My students have amazed me already with their focus, ability levels, creativity, and willingness to take a risk.
One thing I've notices is that being in a bilingual school, vocabulary is CRUCIAL for students, and it's twice as challenging because they're learning in two languages. Even harder for me, is that I teach in English, and I realized there are students that I know would know the answer to my questions or the proper vocabulary in Spanish. So I thought, how do I teach my English dominant students the Spanish vocab. and vice versa. Well, of course I was told "You should make a word wall" but I just couldnt figure out how to make it an organized, and legible(from all seats) success. Plus, my walls didn't have much space I could reach!! So I thought about it. The result? My vocabulary Folder!! There is one folder per table for students to use as reference when they are working. They are particularly popular during reflection sheets, as students use them for spelling! I hope this sparks some ideas, or thoughts about vocabulary walls, charts, folders, etc.


One thing I've notices is that being in a bilingual school, vocabulary is CRUCIAL for students, and it's twice as challenging because they're learning in two languages. Even harder for me, is that I teach in English, and I realized there are students that I know would know the answer to my questions or the proper vocabulary in Spanish. So I thought, how do I teach my English dominant students the Spanish vocab. and vice versa. Well, of course I was told "You should make a word wall" but I just couldnt figure out how to make it an organized, and legible(from all seats) success. Plus, my walls didn't have much space I could reach!! So I thought about it. The result? My vocabulary Folder!! There is one folder per table for students to use as reference when they are working. They are particularly popular during reflection sheets, as students use them for spelling! I hope this sparks some ideas, or thoughts about vocabulary walls, charts, folders, etc.

The front of the folder goes through the various types of images we typically create.

The middle of the folder walks students through the elements of art and the crucial vocabulary they should know by the time they leave Bancroft in the 5th grade. Now, there are always more vocabulary words we cover, but these are just the basics.

The back of the folder lists common supplies/materials we use at Bancroft. It also has the artistic process I use with students and appropriate questions for class discussion during all stages.
Tuesday, August 18, 2015
Portrait Day at ARTventure DC!

During Session 3 of ARTventure DC we explored portraiture in a new way! Campers filled in the background of their final pieces with symbols, colors, shapes, or anything that helped express who they are and what they love! While campers did this, I used the clear glass door, transparencies, and a sharpie to trace their face! We then cut out a frame out of some metallic paper, attached it all together, and the images above and below are what we got! I am thinking about trying this with my students this year by having them place a transparency on a mirror and trace that way!

Friday, August 14, 2015
Full Choice Based: A First Attempt and SUCCESS!!
Envision...Plan...Create...Reflect

The image to the left is a written out version of an artistic process to students. They use this document to guide themselves through their artistic thinking, and to prompt conversation which leads to a deeper understanding of what they're doing, and reflection upon their process. Being at a bilingual school, of course this is in English and Spanish so all students can utilize it. Also, students use a small foam square/piece of paper throughout the class to place it on the step they're on so I know where they are in their process and can prompt with proper questioning.

The document to the right is how we begin brainstorming what a student wants to create. They first complete the "Art Search" where they find a piece of artwork they find unique or inspiring. This piece typically guides them and helps them Envision for the next page "Creation Brainstorming" where they begin to Plan their own project.


(I can't lie it was one of those proud moments that made you want to cry, but also left me feeling a little useless since they could do it all themselves!!!)


Notice the folder on the table in the third image? It's the equivalent of an art vocabulary word wall in one compact file folder! I'll be doing a blog post on it soon! It's a great bilingual teaching resource!!
Wednesday, August 12, 2015
Andy Warhol Prints & Plen Aire Painting!

Campers were introduced to Andy Warhol this week and looked at some of his iconic images. Most campers agreed, he had some funny hair, and looked a little "weird" as they put it. Campers enjoyed the repetition within his pieces and the colors he chose. We used styrofoam plates to gently carve our images into, then printed each plate four times to get the repeating effect of Warhol's work! Check out the results below!

Campers looked closely at the work of the impressionists one day this week as well. They faced the challenge of painting outdoors as the impressionists did. Initially, there was excitement, and many said "this will be so easy!!". Campers quickly learned how overwhelming it can be to choose your composition, and how some things in nature move. It was such an amazing experience, but sadly I forgot to take pictures of their final images! So below are some action shots!!

Our final day of camp we visited the National Gallery of Art to see work by the impressionists we learned about. Campers really enjoyed also finding the Degas dancer within the museum as well. You can see they tried to pose like the dancer! We again, got the compliment that we were one of the most responsible groups of artists the guards and docents had seen throughout the museum!!
Andy Warhol Prints


Impressionist Landscapes


Wednesday, July 22, 2015
ARTventure DC Session 2, Part 1!

ARTventure DC Session 2: Meet the Artists
This week we have another excited and creative group of campers, and it's girls week. Somehow there are only girls this week so clearly we have been listening to TONS of Taylor Swift while making art!
Here is an overview of the projects this post:
- Monday: Henri Matisse: Campers learned about the life of Henri Matisse and focused on his collage technique. Campers created their own collage today!
- Tuesday: Alberto Giacometti: Campers looked at hor Giacometti transitioned from painter to sculptor, and were inspired and challenged to create any sort of sculpture today from easily found materials!

 | ||
| Left: Margo Right: Ames |
 | |
| Left:house, sunset, and flag of Colombia by YuliMiddle: Palm tree and the beach by Adler, Right: House, Moon and stars by Ava |
Even Ms. Foy and Ms. Monica got to make collages today!!!
 | ||
| Left: Sun, Water and Boat by Ms. Monica Right: Mountains and night sky by Ms. Foy |
Tuesday we learned about sculpture! Campers were very excited to begin this project, but then encountered many challenges which they had to work through. We quickly realized that imagining what you want to create can be alot easier than actually creating it.
Materials: Tape(Packing and Masking), Tin Foil, Hot Glue, Paper, Scissors, Popsicle Sticks, Q-tips, Cardboard
Check out our creations!
 |
| Left: House by Ames Middle: Flower and Vase by Margo Right: Flowers, Vase and Tray by Ava |
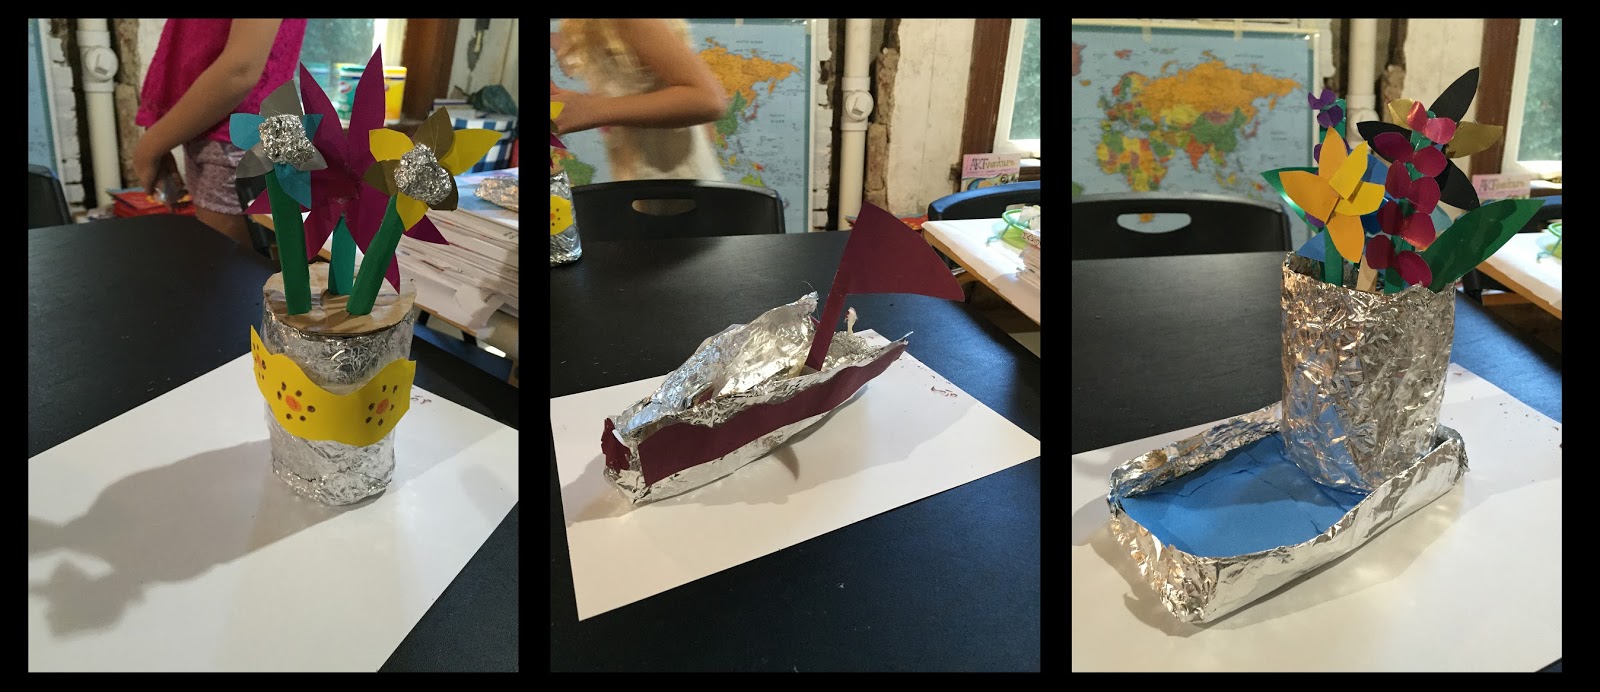 | ||
| Left: Flowers and Vase by Adler Middle: Sailboat by Adler Right Flowers, Vase and Tray by Ava |
Check back soon to see our awesome Andy Warhol inspired printmaking pieces, impressionist paintings, and more!
Subscribe to:
Posts (Atom)