Friday, December 20, 2013

Where is the Orange, Purple, and Green?!

Check out these awesome observational drawings!  

Students reviewed how to draw complex objects by breaking them down into simple shapes, then adding lines to show detail!

    Students used an ultra-fine point black sharpie marker to do the basic line drawing of their objects.  Once it was time to add color, students were given watercolor pencils.  But they quickly noticed something.... they only had  red, blue, yellow, brown, white, and black... So hands quickly shot up into the air requesting the missing colors.  To the student's surprise I reacted as though I had never heard that there were more options within watercolor pencils and explained they would have to think back to previous lessons to solve this problem.  


     Immediatley discussion began about what two colors make green, purple, and orange.  Students quickly realized that...
RED + BLUE = PURPLE
YELLOW + BLUE = GREEN
RED + YELLOW = ORANGE


   Students did a great job layering the water color pencils then adding water on top when finished to turn the average looking colored pencils into magnificent paint!  Check out the amazing results the students of first and second grade achieved!


**Parents:  Color mixing is a great concept to review with your students over the winter holiday. For younger students, read the story Mouse Paint by Ellen Stoll Walsh!  For older students ask them to describe colors using the "Ish".... for example, rather than a color being blue, it could be "blue-ish, green-ish"  for this, have students read the story Ish by Peter H. Reynolds!!


Thursday, November 21, 2013

The Holidays are coming... is your shopping done?


It's a busy time of year and many parents are wondering " whatever will I buy my friends and family for the holidays?".  Well, check out
Bancroft's online GIFT SHOP
through artsonia.com to purchase personalized items such as ornaments, mugs, t-shirts, pens, notecards, keychains, and much more with your child's artwork on it!

These make the perfect gifts!  

This site is maintained my Ms. Foy and the students as well as thanks to some wonderful parent volunteers and highlights all the artwork our students are creating.  You can create a parent account with an e-mail so you receive an update every time new art is published by your child.  Family from all over the world can write notes about the artwork to the students and become a member of their "fan club". Now, just wait... I haven't shared the MOST exciting part.... are you ready?!

Artsonia.com  donates 20% of all purchases back to the ART ROOM at our school!!
Through purchasing with artsonia.com you are not only giving someone an amazing gift, but you are also giving your child the gift of the latest art supplies and materials!!! 

And so...... LET YOUR HOLIDAY SHOPPING BEGIN!

**If you do not know your child's ID name/number for the site, please find Ms. Foy, or e-mail her for it at msfoysartroom@gmail.com !!**


Tuesday, November 12, 2013

What's New in the Life of Ms. Foy?! DUBLIN !!!!

Meet Dublin! No, not the city! Ms. Foy's dog!!

 A lot of my students ask me about where I live, and when I respond with "in a house", they give me a shocked look as to why I don't live in school, well recently (2.5 weeks ago) Paul and I got a dog!  He's an adorable four year old brittany spaniel named Dublin!  He is a wonderful little furry friend and so far my students have LOVED to learn about him and even see a picture or two.  He is a hunting dog and so he loves to look out the window(as you can see, he thinks he fits on the top of the recliner!). 
He's super fun and hyper and LOVES kids and all people and other dogs. At the end of a fun day at the dog park and walking through Alexandria, he  crashes on the couch!  Hope you enjoyed this little insight into the life of Ms. Foy!   Maybe Dublin will get to visit Bancroft sometime during the PS/PK Pets Tools of the Mind theme.


Monday, November 4, 2013

IPAD MINI in ACTION!

Happy Monday!  Check out this quick update on how students are using the Donors Choose Ipad Mini in the classroom!  We have been using it to upload our artwork to an online gallery called artsonia.com! Check out the process here!

Saturday, November 2, 2013

Exploring DC with Earl the Squirrel!


Fall has arrived in Washington, DC and we all know what that means, the dreadful sugar highs of Halloween, a month of multiple 3 day weekends, and of course the beautiful changing colors of the leaves!


I can't express in words how amazing the story pictured to the left is for not only exploring scenes of Washington DC, but also of showing the changing of the leaves.  This project is done with my Pre-K 3's and 4's and they absolutely love it.  


    We start by having Earl the squirrel come out (yup, my old TY Beanie Baby-remember when those were cool?).  We then read the story and throughout look at the different architecture we recognize as well as the colors of the leaves.  After reading the stories we make collages with pre-cut green grass shapes and a brown tree trunk, and students glue scraps of paper as leaves.  The most unique part of this process is looking at what students choose.  At this age color is something students take seriously, or are still very playful with.  Some students will stick to digging out only the yellow, red, and orange scraps to achieve a "true" fall tree collage however some students will end up with purple, gree, blue, pink, and a variety of colors on their trees, and THATS OKAY!

I find that many times as adults, we want students to do the projects exactly as we have planned in our minds, and so to some, purple leaves or magenta leaves are not okay, but for me I love to ask the students about why the leaves are those colors.  You wouldn't imagine the responses of what those colors represent whether it is fruit within the trees, animals, or "ummm, because I like this color.".  It's crucial to let your students and children make their own artistic choices. Let them show their voice and express themselves through their art!  


Wednesday, October 16, 2013

Donors Choose Status: FUNDED!!!!!!!!

THANK YOU TO EVERYONE WHO
SUPPORTED MY DONORS CHOOSE PROJECT OF AN
IPAD MINI FOR THE ART ROOM!!!

I continue to be so thankful for the many people in my life and the world around us who are so supportive of advancing art education in our schools today.  I cannot even begin to tell you all how gracious I am.  This project was funded in under a week thanks to all who helped by donating, spreading the word, and sending their thoughts my way!  
Me, Chelsea, and Leigh!
 
So... Some Special Thanks!!!
 
CHELS and MRS. LEIGH: I've known you both for...hmmm...roughly 17-18 years now? For those
who don't know, Chelsea is my best friend, and Leigh is her Mom! You have both always supported and helped my love of art grow and made me into the teacher I am today, THANK YOU!

CENTRAL OFFICE staff including Brian Pick, Amanda Boggs, and Heather Holaday and many others: thank you so much for providing me with opportunities such as these to expand my practice.   Being supported by your district is crucial and knowing that these people understand the importance of art education keeps me going!

ESIN OZDAG: Although we've never met you have changed the lives of my students as well as my experience as a teacher.   Thank you SO very much for donating to this project.  It means so much to know there are supporters out there amongst the political drive of DC. 

ANONYMOUS and MATCHING DONOR: I cannot say thank you enough not only from myself but all the other teachers out there who you have helped by donating or matching gifts for.  Educators today feel so supported by you all, and although I'll never meet you, you will always hold a dear place in my heart!

Monday, October 14, 2013

ATTENTION ATTENTION!!!! Donors Choose Project is Up and Running!!!

Have you heard of Donors Choose
        It's a great site where teachers can post projects online that they need the supplies funded for I've
        done Donors Choose twice before for sketchbooks, as well as for supplies to create marbled
        paper!  Well, now I'm hoping again for a funded project so I can have a IPAD MINI for my
        classroom!

Now, many of you are wondering...
        "Why do you need an Ipad?".... 
 
       Well, besides the fact that it is the constant source of music which my students LOVE... I would
        like an Ipad specific to the art classroom so it can be used by students to research images, create
        art on, explore art history, and also to upload artwork onto an online portfolio system. I also
        would like to use it as a resource for students with special needs to help them further engage and
        interact with art.

The Bottom Line is...
      We live in the 21st century where technology is crucial to student success and students need to have
      these experiences and skills to succeed in our technology driven world.  I'm hoping that this Ipad
      will begin to provide my students with those experiences and who knows, maybe one day I'll have
      a class set of Ipads to use!!!

Let's Get This Project Funded!!!

Share this project with your friends, families, businesses, co-workers, art appreciators, and anyone else who wants to make a difference within the art room!

It's Easy... Just Click This Link!!!

Saturday, October 12, 2013

Choice Based Art: The First 6 Weeks!

 Hey fellow art teachers! Ever wonder how to introduce to students to choice based art education?  I've gotten so many questions about just how do my students know what supply to choose?  How do they get that initial urge just to "play around" out of their systems?  

Well, here's an overview and glimpse into how I teach my students to choose wisely, and make educated choices that will ensure them success! 

The first six weeks:  Exploratory Learning through Material Exploration

Students enter the room and there are six "stations" set up.  I usually make these stations more complex and higher level supplies such as Charcoal, Chalk Pastel, Oil Pastel, Watercolor Crayons/Pencils, Watercolor Palettes, and Liquid Tempera.  

These centers also help students experiment and learn how to properly use and manipulate each supply.

Students fold a piece of paper into sixths, then have black markers at all tables so they can label each square with it's supply.  

Students then rotate through the tables(roughly 5 minutes per table) to experience each supply.  I usually do not limit them to what they must draw in each box, we stick to simple drawings because the purpose of this activity is to gain experience and knowledge on each supply.  


 So what are those papers labeled with the supply and the sticky notes?  This is how students share their tips, suggestions, and thoughts with other students throughout the school about each supply.  

By each supply in the classroom, we have a chart that has two columns.  One labeled "The Good" and "The Bad".  Students post sticky notes with challenges they encounter while using this supply, or things the supply works very well with/for. 

    Once the station day is over, the following class students review basic concepts such as using the elements of art within a piece as well as key genres of art such as portrait, landscape, still life, etc.  These next 4-5 weeks are when we practice the procedures of responsibly getting up, retrieving, cleaning, and putting away supplies while completing review projects.  It is crucial that students learn, understand, and demonstrate the ability to take care of their supplies and environment properly during these weeks.  During these weeks I also introduce them to the concept of tracking their own time by using a darkroom film developer timer.  It is color coded as follows: 
       Yellow: 10 minutes of Group Instruction
       Green: 27 minutes of Independent Work Time
       Orange: 3 minutes (Clean up begins for paint, charcoal, chalk pastel)
       Red: 5 minutes of all students cleaning up their materials and work space.

    After these initial 6 weeks I have found that students are able to make educated choices about the remainder of their projects throughout the school year.  I will admit, there are times that these procedures seem to be lost in the excitement of field trips, holiday breaks, or three day weekends.  So what do I do when that happens?  Well, we go back to the basics.  If students are not properly cleaning up their supplies and classroom, they lose that supply for a week.  If we have forgotten a simple procedure such as how we enter the classroom quietly, we stand up line up back outside, and try again until it is done correctly.  The visual timer is great at these moments because they are able to see the time which they are losing that day because of their behaviors.  

So, there you go, a brief but hopefully helpful introduction to the daily life in a choice based art room.  It may look like chaos when you walk into my room, but talk to any student, and you'll find inside, it's organized!


Friday, October 11, 2013

Got Bark?


Hispanic Heritage Month is alive within our art room, and we continue to celebrate as second and third graders through creating our own bark art paintings! 

Bark paintings originally came from Mexico, more specifically the Aztec people!  Students learned about the process of preparing a piece of bark for painting that the Aztecs used and that these bark paintings were typically of celebrations, or things the Aztecs valued and enjoyed.  

Students first drew their chosen image with a black marker then used Q-tips to paint in their image.  Students only had red, blue, yellow, and white paint to use so they had to think through mixing the green, orange, and purple that were in so many of their paintings! 

It's often the painting portion which students claim is their favorite part of a project, but surprisingly polls showed students really enjoyed balling and crumpling up their paper before starting to give it the bark like texture was a favorite moment! 

R.O.A.R to my classes for being so responsible while using paint!


Thursday, October 10, 2013

Happy Hispanic Heritage Month!

Throughout the past few weeks students have been completing projects to celebrate Hispanic Heritage Month! 

Kindergarten and first grade have been learning about and creating molas.  Although most molas are made out of fabric, we used paper.  Students first looked at different molas and found that many focused on animals and looked as though they had multiple layers of color.  Students began by drawing an animal and tracing around it to create the illusion of layers.  

After looking at exactly what a mola was usually an image of, students identified that these molas were made with many details which were various lines and shapes.  After drawing and filling in their animal with details, students used markers to color in their animal in the same way as mola colors looked.  Students found molas were very bright and colorful. 

To the right, you can see students cutting and gluing down their mola animals on a black base paper.  Students then used pre-cut strips of construction paper to add details around their animals.  The artwork pictured to the left, is by a student who decided to include not only her animal, but it's environment surrounding!  I love creative moments like this where students take a project and take it to the next level!

To the right you can see a first grade student thinking through where he is going to place his blue strip of construction paper.  The process of students thinking about where something will go before they actually place it there is a very important skill!  I'm so proud of these students for showing that they are thinking, processing, and making artistic decisions!

Thursday, October 3, 2013

Allow Me To Introduce You To....


The Art Room 
Red Clawed Crabs!


So many classrooms at my school are getting awesome class pets, from our heroic Lola the Hamster, to a turtle, guinea pigs, fish, and even a desert tortoise!  Well, I have some fish at home and of course while at the pet store picking up some fish food I saw these crabs!!  In case you didn't know, I love crabs.  Maybe because I'm from Baltimore?  Or because they're delicious? I don't know, but I fell in love with these!  They're super easy to take care of, and something my students don't always get t see up close and alive.  So I figured, why not?!  So let the naming process begin.  We have decided one is a boy and a girl (as to not show favoritism...not based on any factual knowledge of crabs.... we just decided it's only fair to have a girl and a boy).  As K-5th grade students visit the art room this week they are meeting the crabs(looking only!!) and getting a sheet to suggest possible names and why they feel the names would suit the art room crabs!  So stay tuned for the results!

Sunday, September 29, 2013

Student ROAR!

Shout out to one of my wonderful students!  We began our Hispanic Heritage Month projects this week and her class is learning about the art of the Mola.  We learned about the many layers of colors within a mola and created animal themed pieces this week.  Students used a black permanent marker to draw their animal, then will color them this week.  Although most mola art is made of fabric, we are using paper and a collage technique to make ours in class.  Check out this AMAZING photograph of my students weekend art project, which she shared with her family.  
ROAR To Margo From Ms. Foy! 
ROAR to the Trowbridge's for encouraging art not only within school, but at home!
A ROAR is a way that we say thank you to students and staff for being responsible, respectful, and ready to learn every day!
**Permission was granted from parents to post this picture**

Let's Talk About Circles and Feelings!


...Happy...Silly...Goofy...Mad...Sad...
...Angry... Ecstatic...Grumpy...
              ...Surprised...Excited... Disappointed...Anxious... 
       Glad... Confused... Frustrated...


    Last week you got a peek into how I teach my younger students to begin drawing and recognizing circles.  Now, since they have begun to grasp the concept of a circle, we are learning how to turn a circle into a face!  I usually push students a bit farther with this project by reading the story Today I Feel Silly and Other Moods That Make My Day by Jamie Lee Curtis. While reading the story, I make sure to ask students to watch how my face changes while I read through the book for each emotion the character feels(disclosure: when I read this book to the students, if you were just listening, you would probably call me the crazy moody art teacher... my voice and face goes from happy to sad to mad to glad to excited.... and so on... but the students LOVE it).


After we read the wonderful story, we practice making all of our different faces. I review with students around and close for a circle but show how I can also add eyes, and a nose.   When we get to the mouth, I show students how just by changing the kind of line they use, they can
change the way their face feels!  I think these Pre-K 4's did a SUPER job!  Check out all the varying emotions and feelings shown within their art!


Tuesday, September 24, 2013

Around and Close....Tap, Tap!

I LOVE this shot I took because of the shadows!


A while back I posted on the terror of using liquid paint with the adorable, but young pre-schoolers or Pre-K 3's as they are now called.  

They're cute, funny, shy, and curious...
and if you give them paint.... they tend to become cute but crazed monsters covered from finger to elbow!!

So what did I decide to give them this morning?

PAINT!


We started with the story Mouse Paint by Ellen Stoll Walsch.  Students review their colors by helping me read along to this brief but exciting kids book. (which I've heard comes in SPANISH too?! WISHLIST ITEM!)

After reading the story I introduce the ever so important shape: Mr. Circle.  Explaining to students, that the way we draw Mr. Circle is by saying "Around and Close"(this is said while creating a circle with a counter clockwise motion).

Students practice in crayon drawing circles while saying those three magic words (no, not "I LOVE ART") " Around and close" until 10 minutes until the end of class.  I then distributed the paint(pictured above) and baby food jars for students to use as stamps! Look to the left to see them in action! We usually say "Tap, Tap" for stamping.  Once when we dip the jar into the paint, then when we gently stamp it onto our page!  Students did a great job stamping their circles and made some awesome abstract art today!  

Fear of Liquid Paint with 3-year olds: CONQUERED!

Wednesday, September 18, 2013

Flowers...? AGAIN?

I've had the same flowers and vases in my classroom for the past 3 years now, and I really couldn't stand to put my students through drawing them yet again. So this year I got creative! I've collected random clear glass jars, vases, etc. and rather than flowers, I put succulents and moss inside with pebbles under the soil for some extra details. 

Rather than forcing students to draw exactly what they see and exactly how they see it, I asked them to simply draw some things they saw however they wanted to arrange them on their page (we discussed composition within art).  We recall last year, how we learned every mark comes from lines, which create words, and lines, which create shapes.  To the right, you can see a student who really enjoys drawing realistically, and so she drew just what she saw using only a black ultra fine point marker.


Why use a black marker?  Because in art there are no mistakes.  Students come to me once per week or per 6 day cycle, and are exhausted by always being pushed to find or read the "right" answer.  I explain to students that in math and reading, yes, there is a correct answer or correct word. A-R-T always spells ART, that won't ever change, but when they're in art I want them to understand there is NO RIGHT ANSWER.  This is their release, their time to break free from the pressure of needing to be right, and by using a black pen which you cannot erase, they learn that "mistakes" or "mess-ups" are in fact art.


 Above you can see a student who has chosen to draw the vase, and does so with excellent technique!  You can also see another plant in a glass as well as one student who chose to think outside the box by drawing a flower and imagining the pebbles from the bottom of the glass swirling around and into the flower.  Now that's imagination and creativity!  If this is just the beginning of my students hard work this year, I'm already ecstatic to see how I can help them blossom and develop their skills even further!


First Days of School! First Days of School!

 As I toss and turn anticipating the first day of school with my students, I cant fall asleep! And then...

"ONCE UPON A TIME A FEW MISTAKES AGO, I WAS IN YOUR SIGHTS, 
YOU GOT ME ALONE, YOU FOUND ME, YOU FOUND ME.....

NOOOOO, NOT THE SOUND OF MY ALARM CLOCK!! 
(and yes I admit, my alarm clock is "trouble" by Taylor Swift!) 

SNOOZE BUTTON, WHERE ARE YOU?! 

"CUZ I KNEW YOU WERE TROUBLE WHEN YOU WALKED IN, 
SHAME ON ME YEAH...TROUBLE TROUBLE TROUBLE...."

OKAY OKAY FINE, I'M UP! 


So, maybe my wake-up wasnt that dramatic but the minute my feet hit the floor, the excitement settled in... I get to see my students today!  Summer may only be roughly 8 weeks, but I feel like my students change SO much in such a short time!  Every morning I greet students as they walk into the building.  This builds a relationship with all my students and their families that I truly value.  So I bet you're all wondering what happens the first week of school in art right?


  Self-Portraits!
Shifting back into art usually starts with self-portraits in my room, we discuss the  different lines we know, the different shapes, and apply them to drawing a person.  This is a great activity because it's something we go over multiple times every year, so all students are comfortable and it's nothing new or intimidating for them.  Above you can see a student drawing himself, notice his attention to detail through drawing the sharks on his shirt that he is wearing that day(last year we really worked hard on creating more unique compositions through the addition of details!)

The rest, honestly, I can't put into words so take a look at some of the rockstar self-portraits below from across grade levels!


Monday, September 2, 2013

NEWSFLASH! NEWSFLASH!

Blogging on Labor Day Weekend?  I know, crazy Ms. Foy, BUT I just received some exciting news on my e-mail!

The Bancroft Art Program just won $100 to Blick Art Supplies!

How? Might you ask... well it all started with the discovery of the smART Teacher website! 

This is a website which is the equivalent of a candy store for a kid but to an Art Teacher!

On this site, art teachers from across the world post all sorts of handy documents like lesson plans, bulletin board ideas, fundraising ideas, rubrics, classroom organization tips, the possibilities are endless....
So, blick art supply hosted a challenge, and every teacher who submitted two lesson plans with student work examples would be entered into a drawing for one of six $100 gift cards!!

AND WE WON ONE!

Check back for a post about what the art program gained due to this generous opportunity from The SmART Teacher and Blick Art Supply!

Friday, August 9, 2013

Summer of an Art Teacher

Summer vacation a major perk of being a teacher (or so most of society thinks) and to some extent, it is a great perk, but it's not all fun and games.
So here's a glance into the summer of this art teacher..... 
 
June 21: SCHOOL'S OUT FOR SUMMER!
 
June 22-24: This was a crazy few days of moving all my things into my new place in Virginia.  I only had about two days to move because on June 25 I was headed to......

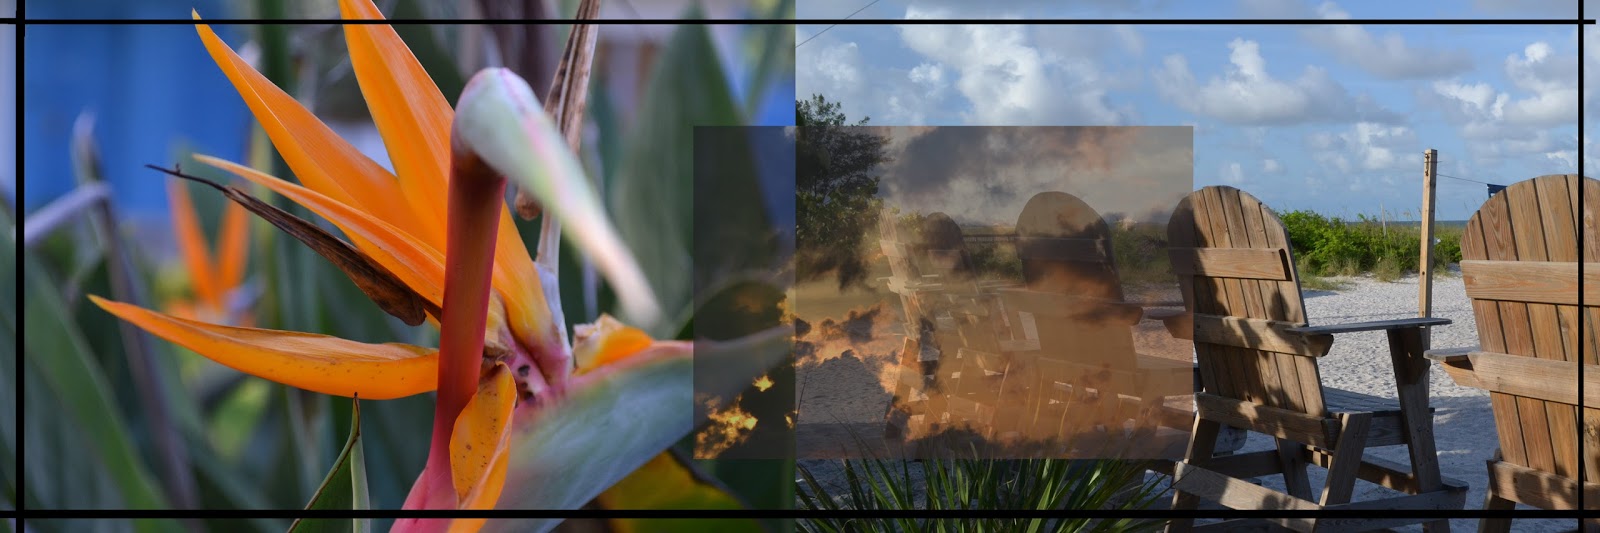
June 25-July 1: FLORIDA! 
    Alright, so this clearly looks like fun and games, which it was, but everyone deserves a vacation right?  I went to Florida for about a week to visit my best friend who I have known since the SECOND GRADE!  She lives there now, and we spent a week at St. Pete's Beach on the west coast celebrating her birthday and just relaxing on vacation.  As you can see I also got a chance to brush up on my photography skills during our days exploring... St. Pete had so much beautiful nature and wildlife, I could hardly put my camera down! 

July 4, 2013: A True Capitol Fourth Experience
The fourth of July brought me back to DC and what better way to celebrate than going to the National Mall?  I began my fourth by celebrating with an old teacher from work who was in town to get married.  It was great to see her!  I then headed with my sister and brother-in-law to the Capitol where with some help from a great Capitol Police Officer, we got all the way up to the actual Capitol steps and balcony area to relax and watch the concert and fireworks.  It was a great concert, and the fireworks were great as usual too! 


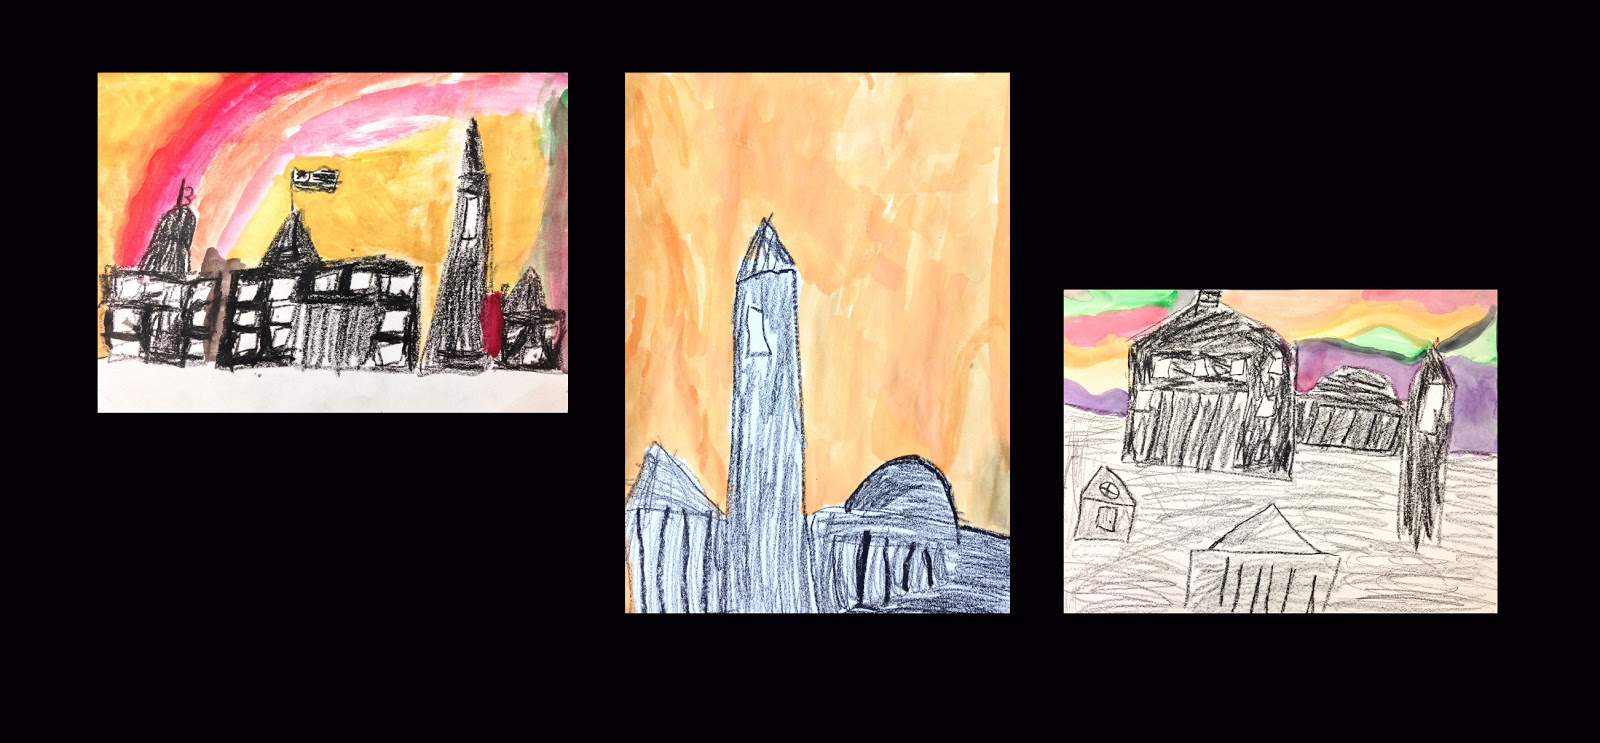
Now, let me pause right here... I'm realizing this really does all look like fun and games, I should probably add that roughly 3-4 days per week I have been reporting to the central office to work on some after school program curriculum as well as do some coordinating for the art department.  This is a great experience for me to have some leadership and curriculum writing skills not only at a school level, but at a district wide level.  I can't lie though, when writing curriculum for after school, I usually do a fair amount of drawing and coloring the project examples! Okay, now back to the fun and games..... 

July 6-July13: Minnesota
Minnesota is the land of 10,000 lakes, and for sure, there are TONS of lakes.  I had the opportunity to travel to Minnesota with my boyfriend, Paul (many of you parents may recognize him as the Art Auction security/bartender) to see where he grew up, went to college, and meet family and friends.  We hit the ground running by going to the Mall of America, the Mall of America Aquarium, Bunker Beach (waterpark), The Minnesota Zoo, Lake Calhoun, the Sculpture Garden, and tons of restaurants and attractions in downtown Minneapolis.  It was a great trip where I got to see some amazing art, and meet some wonderful members of his family. Of course, being fair skinned, I managed not to get sunburned in Florida, but got rather sunburned in Minnesota!!  
 
July 13-August 2: Now my summer winds down, I spent alot of time working on New Teacher Orientation Presentations, helping our new art department specialist settle in, and refining the after school art enrichment curriculum.    


August 2-August 5:
You guessed it! PITTSBURGH!! I took Paul to experience Pittsburgh for a weekend since he had never been before.  We went to a Pirate's game, Primanti Bros, Kennywood, Mt. Washington, Station Square, South Side, and Shady Side.  You may or may not know I went to Carlow University for my undergrad degree and loved every minute so of course, I loved returning to see how campus has changed.  It was a great jam packed weekend, my only regret is that the incline was not operating so we didn't get to go up to Mt. Washington on it, we had to drive, but overall it was a wonderful fast end of summer trip.  
 
Don't worry, the fun doesn't stop there!!! 
 
August 11th: I travel to celebrate my Grandmother's 90th Birthday! 
 
August 15th: I meet the new art teachers to the district! 
 
August 19:  WEEK ZERO BEGINS! That means back to work to get ready for the year!
 
August 20:  I GET KEYS to the new place I am moving in Virginia!  
(moving during the beginning of school is no fun, but oh well)
 
August 21:  Art Teacher Day!  I get to go to the museums to learn how to be a great teacher!
 
August 26:  FIRST DAY OF SCHOOL!! I am so excited to see all my students and their families again!

Thursday, June 13, 2013

Basic Shapes Turned into Masterpieces!


Early childhood art education tends to be one of those topics that many art teachers in their beginning years are just at a loss to handle.  I know I was a mess my first year.  I couldn't decide if I should just let them go free and create?  Or force them into tracing pages to learn their shapes?  Or just let them mix paint all the time?  And then something just worked one day, and it was the use of BOOKS to introduce and inspire students to create art.  

So here's how it works... This project was using the book "Up Close" by Gay Wegerif.  Studentsbegin by coming in and sitting quietly on the carpet.  While reading the book I like to pause every now and then to ask what they think the animal is before I turn the page to reveal the actual animal.  After we finish the story,  we go over the basic shapes that were used to make all of the animals in the story...square, rectangle, triangle, circle, semi-circle.  I then explain that at their table there are all of these shapes pre-cut and glue sticks for them to create their own animals today.  Students are given their papers one by one and head to a seat to begin.  Towards the end of class students received a white crayon so that they could add any final details they wanted.

I hope you enjoy the wide variety of animals students made as pictured above!!

Helpful Hints: I've found students get a bit restless at such a young age after about 35-40 minutes of art and so I usually try to have a basket of books for them to read so if they finish early, they know they have the option of sitting on the carpet quietly and reading.

* looking for more great books to inspire young artists?  Check out the Great Summer Art Reads Page to see a list of the books I use in my classrooms!

Thursday, May 30, 2013

"Hey! But...Where's the BLUE?!"


Artwork Inspired by Sky Color by Peter H. Reynolds
 A fellow art teacher recommended the book Sky Color by Peter H. Reynolds and as soon as I read it, I thought of this project!  The story begins with a young artist in school whose class is painting a mural.  She decides to paint the sky portion but when she rummages through the paints there is no blue to be found!  

"How can we paint the sky with no blue paint!?"
* This is a question asked in the book itself, and at this point, I stop reading the book so students have the opportunity to solve this artistic challenge on their own!*
 
 This is the key question I posed to students in order to complete this project.  Now, of course we first reviewed our earlier unit on architecture and those famous examples found in our city.  Students first drew their cityscape in black crayon.  After finishing the architecture of their piece, students got watercolor palettes and were shocked to find that I had covered all the blue with tape so they could not use it!!  

Needless to say, they were able to use their creative minds and problem solve a solution.  Really, the end results featured here show you exactly how they solved this artistic challenge.  As students completed their work I finished the story so they could see how the main character Marisol solved this challenge.  Students were excited to see that they solved this challenge the same ways Marisol did and using the same colors!  They thought about the different times of day(just as she observed the sky at different times of the day) and were able to think of the night sky, sunrise, sunset, rainy days, sunny days, windy days, and much more!

I'd like to congratulate the awesome work by these first and second grade students!  They really impressed me with their artistic problem solving skills! 


Monday, May 27, 2013

Diving into Printmaking!


While exploring printmaking in college, I can't even  begin to count the number of times  slipped and cut myself with a linoleum cutter.  And for this project, I was putting that exact same tool that I had encountered difficulty with at the age of 20, into my third graders nine year old hands.... I just kept thinking to myself.... 

"Are you CRAZY Ms. Foy?!?"

Needless to say, I had to really think this whole process out.... 

So we started with simple instructions clearly posted on the board.  I spent a shortened class we had due to an assembly actually going through this entire process step by step prior to beginning the project with them.  This really helped my students understand not only the process they were about to explore, but the safety measures with this project.  


As students began to prepare for cutting into their EZ-Cut (a softer version of linoleum), they again had to go back through safety instructions with me and sign a paper acknowledging that if at any time they are not demonstrating these precautions, they will stop their project.  Overall there were three basic guidelines...
  1. I will stay seated at all times and never point the cutter towards another student.
  2. I will always keep my hands behind the blade, and always cut away from myself.
  3. If at any time I am not cutting or need to move from my seat, the blade will be safely resting on the table.
Once finished cutting, students took turns rotating through three inking and printing stations.  Two students showed an amazing natural eye for the inking and printing process and quickly became my assistants.  Those two students took on leadership and taught and supervised every other student in inking and printing their piece.  I think one of the things which simply amazed me, was one of these students hardly spoke English, and yet she so quickly grasped and became a leader with only watching, and my English instruction! 
 

My inking stations were made simply by taping down two overhead transparencies onto the table.  Students used a rolling pin or extra brayer to push down for even pressure when printing.  We also made a list of all students, so that everyone had a chance to print.  As students were called up to print, the remainder of the class completed a reflection page. 


 Students did an amazing job on this project and in regards to my safety concerns... we had ZERO injuries.  I have learned so much about my students within this project, even those who I truly told myself that I was out of my mind for putting a sharp object into their small hands amazed me with their maturity and mastery of this process. 
A few of our printmakers even had their prints displayed at the Azerbaijan National Flower Day festival!  Check out that post HERE!


* This process turned out to take roughly 3 class periods and required additional help and participation by two amazing classroom teachers.